![How To Get Professional Vocals in Logic Pro X [With Only Stock Plug-Ins!] - Logic Pro tutorial by Music By Mattie](/images/blog/covers/professional-vocals-stock.webp)
How To Get Professional Vocals in Logic Pro X [With Only Stock Plug-Ins!]
Do you want to make your vocals sound like a professional studio recording? Look no further! In this video, I'll show you the secrets of achieving pro-sounding

Key Takeaways
- Use only the $75 Shure SM58 or $200 Audio Technica AT2020 for professional results.
- Always apply pitch correction first before any other processing in your vocal chain.
- Cut frequencies below 100-170 Hz and around 250-500 Hz to eliminate muddiness and boxiness.
- Use two compressors instead of one for more natural-sounding vocal control and dynamics.
- Great vocals start with great recording - no processing can fix a bad performance.
Getting your vocals to sound professional can feel impossible — especially when you’re working with stock plugins and limited experience.
But here’s the thing: professional vocals aren’t about expensive gear or fancy plugins. They’re about understanding the fundamentals and applying them consistently.
I’m going to walk you through my complete vocal production process using only Logic Pro’s stock plugins. By the end of this post, you’ll have a step-by-step system that transforms basement-sounding vocals into polished, radio-ready tracks.
I also made a full video on this…
All the ideas in this article come from the video below. If you don't feel like reading, well, I gotchu.
Part of the DAWs & Production Software series — For the full picture, read my full DAW comparison guide.
Step 1: Recording Your Vocals (Get This Right First)
Before you even think about plugins, you need to nail the recording stage.
A bad recording can’t be fixed in the mix. Period.
No amount of EQ, compression, or effects will save a lifeless performance, missed syllables, or mispronounced words. You need to get it right at the source.
The Microphone Question
You don’t need to spend thousands on a microphone. For around $75, the Shure SM58 will get you professional results.
This dynamic mic is my first recommendation for any producer ready to step up from iPhone recordings. It keeps your voice clear and crisp without breaking the bank.
Want to spend a bit more? An Audio Technica AT2020 condenser mic (around $200) will give you better high-end detail than the SM58. Condenser mics are more sensitive and capture more of those shimmery frequencies that make vocals pop.
My Recording Checklist
Here’s exactly what you need to do every time you record:
- Set your levels correctly — avoid clipping at all costs
- Position yourself 4-8 inches from the microphone
- Record in an acoustically treated space — or use a closet to deaden reflections
- Focus on emotion, timing, and flow — these can’t be fixed later (pitch can be)
- Take multiple takes of each part for comping the best sections together
If you can’t record in a treated room, a makeshift vocal booth works wonders. I’ve got a full guide on building one for cheap if you need it.
The key here? Get the performance right first. Technical perfection means nothing without emotional connection.
Step 2: Gain Staging (Before Any Plugins)
This step gets overlooked constantly, but it’s crucial for consistent results.
Gain staging means balancing your vocal dynamics before you add effects. You’re looking at the waveforms and listening to identify parts that need volume adjustments.
In Logic, this is super easy:
- Hold Command to access the Marquee tool
- Highlight the section you want to adjust
- Click on the Clip Gain parameter and adjust up or down
Some vocals (especially rap vocals) don’t need much gain staging because they’re already dynamically consistent. But most vocals have loud and quiet sections that need balancing.
Pro tip: Click the waveform visibility button to make your audio more visible. There’s even a slider to adjust how much detail you see.
Step 3: Vocal Tuning (Always First in Your Chain)
Vocal tuning goes first. Always.
Logic’s pitch correction plugin lives in the Pitch folder. I use it on literally every vocal — not to make singers sound robotic, but to tighten up natural imperfections.
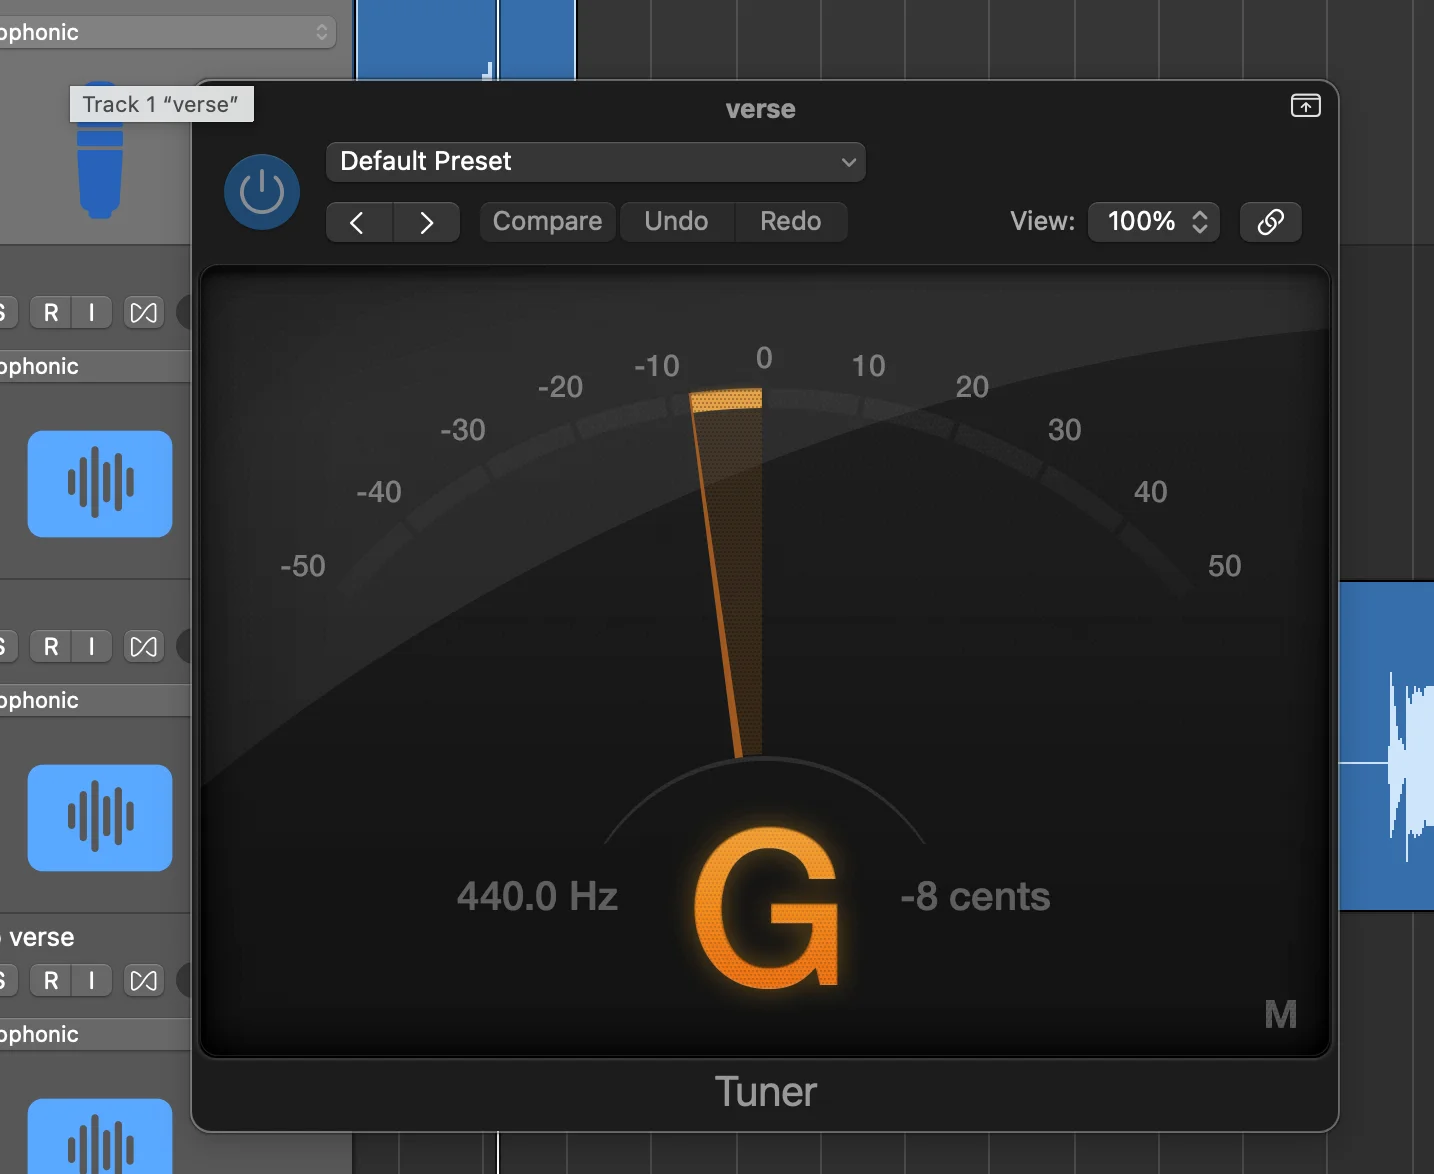
Here’s my process:
- Set the key of your song (stay tuned for my upcoming video on finding keys without music theory)
- Adjust the response time for the effect you want:
- Fast response = more obvious Auto-Tune effect
- Slow response = more natural pitch correction
The goal is subtle correction that enhances the natural performance, not replaces it.
Step 4: EQ (Shaping Your Sound)
Now we’re getting into the meat of vocal processing.
In Logic, hit I to open the channel EQ if it’s not already visible. Here’s exactly what I do for vocals recorded through an SM58:
High-Pass Filter
Cut everything below 100-170 Hz. Vocals don’t need that low-end information — it just muddies your mix.
Lower Mid-Range Cut
Subtract frequencies around 250-500 Hz. This range often sounds boxy and removes clarity from your vocals.
Mid-Range Adjustment
Dip some frequencies in the 500Hz-1kHz range. How much depends on your voice and microphone.
With the SM58, I sometimes need pretty extreme cuts — up to -8 dB in problem areas. Trust your ears over any “rules.”
High-End Boost
Add some shine to the top end. Dynamic mics like the SM58 don’t have the natural shimmer of condensers, so I boost the highs to compensate.
These settings won’t work perfectly for every vocal, but they’re a solid starting point. If you’re struggling with EQ, I’ve got preset packs that handle this for you — including a free version you can grab below.
Step 5: Compression (Bringing Vocals Forward)
Even after gain staging, you need compression to get that professional, upfront vocal sound.
I love Logic’s Studio FET compressor — it’s modeled after the legendary 1176, one of the most famous vocal compressors ever made.
First Compressor Settings:
- Attack: Medium to fast
- Release: Fast
- Ratio: 4:1
- Auto Gain: Off
- Auto Release: On
- Adjust threshold until you’re getting about 5 dB of gain reduction
The Two-Compressor Trick
Here’s where it gets interesting. Duplicate that compressor by holding Alt and dragging.
Two compressors working together sound more natural than one doing all the heavy lifting. It’s like using two hands instead of one — more control, less strain.
On the second compressor:
- Keep the same settings
- Turn the Mix knob down to about 60%
This creates parallel compression — you’re blending the compressed signal with some of the original dynamics. It gives you control without squashing the life out of your vocal.
Step 6: De-Essing (Taming Harsh Frequencies)
After boosting the high end with EQ, you’ll often have harsh sibilance — those sharp S, T, and K sounds.
De-essing is surgical frequency control. Logic’s De-esser 2 (found in the Dynamics folder) handles this perfectly.
The key to effective de-essing:
- Find a vocal part with an “S” sound
- Put it on loop
- Toggle the de-esser on and off until you hear it working
- Adjust parameters until the S sounds are controlled but not lispy
We want the overall high-end shine, just without the ear-piercing sibilance.
Step 7: Subtle Distortion (Adding Thickness)
This is where vocals get that professional thickness you hear on records.
Distortion isn’t about making things sound dirty — it’s about harmonic enhancement. We’re adding subtle saturation that makes vocals cut through the mix.
Load up Logic’s Overdrive plugin (in the Distortion folder):
- Low Pass: All the way up to 20kHz (no filtering)
- Drive: Start around 6 dB
- Output: Turn down to compensate for the added gain
Keep this super subtle. You should barely hear it working, but when you bypass it, the vocal should sound thinner.
I usually end up around 2-5 dB of drive. It’s all about little improvements adding up to a big result.
Step 8: Ambience (Creating Space)
Now we’re moving into send effects. These get routed through buses instead of being inserted directly on the track.
Click on your Sends area (hit I if you don’t see it), then route to Bus 10. Name it “Ambience.”
For ambience, I use Space Designer from the Reverb folder. This creates the sense of a small room around your vocal.
Settings:
- Go to Small Spaces > Rooms
- Pick a preset that sounds good (I like “Thicken Vocals”)
- Wet: 100% (this is a send, so we want only the effect)
- Dry: Muted
Now use the send knob on your vocal track to blend in the ambience to taste. More send = more room sound.
Step 9: Reverb (Adding Depth)
Create another bus (Bus 11) for reverb. This gives your vocal depth and helps it sit in the mix naturally.
Another Space Designer instance, but this time:
- Choose a medium to large space
- I like Large > Clean Room for most vocals
- Wet: 100%, Dry: Muted
Pro tip: You can add EQ after the reverb to shape it further. Sometimes I’ll high-pass the reverb to keep it from muddying the low end.
Step 10: Delay (The Final Touch)
Last bus (Bus 12) gets Stereo Delay from the Delay folder.
My delay settings:
- Output Mix: 100% left and right
- Use the built-in EQ to tame the highs and lows
- Different note values for left and right (eighth notes vs. quarter notes) for a wider stereo effect Different note values for left and right
Here’s a cool trick: Add another reverb to this same delay bus. Keep some dry signal this time and blend to taste. This creates a lush, expensive-sounding delay trail.
Quick Pro Tips for Next-Level Vocals
Want to take things even further? Here are techniques that separate amateur from professional vocal productions:
- Record harmonies to thicken your sound
- Double and triple track your lead vocal, then pan copies left and right
- Add ad-libs in the gaps to maintain energy
- Record octave doubles for extra thickness
You can use this same vocal chain on all these additional tracks — just copy and paste, then make small adjustments for each element.
The Results Speak for Themselves
Following this exact process transforms vocals from basement demo quality to professional, radio-ready sounds.
The magic isn’t in expensive plugins or gear — it’s in understanding each step of the process and applying it consistently.
Every technique builds on the previous one. Skipping steps or rushing through them gives you inconsistent results.
Your Next Steps
Start with this chain on your next vocal recording. Don’t try to reinvent the wheel — follow the process exactly, then adjust to taste.
If you’re getting frustrated with the EQ settings or want to speed up your workflow, grab my free vocal presets. They’re built using this same stock plugin chain and give you professional results with just a few clicks.
Remember: great vocals start with a great recording. No amount of processing fixes a bad performance.
Get the fundamentals right, apply these techniques consistently, and your vocals will sound like they belong on streaming playlists — not in someone’s basement.
About Mattie
Mattie is a music producer, songwriter, and educator specializing in Logic Pro and vocal production. With over 10 years of experience in the music industry, he's helped thousands of artists transform their home studio recordings into professional-quality tracks.
As the founder of Music By Mattie, he creates tutorials, presets, and courses that simplify complex production techniques. His mission is to make professional music production accessible to everyone, regardless of budget or experience level.